ANOTHER SPOOKY DIY! BUILD THIS SPOOKY FENCE!
DIY WOODEN GRAVEYARD FENCE!
Grimey
Grimey here, coming at you with another Halloween DIY! This time, we're venturing into an easy wooden pallet fence that's sure to add some eerieness to any yard haunt. It's an extremely simple build and can cost close to nothing.
Things you will need for this project:
Stack of pallets (the more the better, I used 8.)
Nail Gun (I used and air gun and brads)
Wood Glue
Jig Saw or Sawzall (I used a jig saw but a Sawzall would be more proficient)
6 posts (broom handles or something similar)
As for the pallets, I'm lucky enough to work at a factory where I have a bunch to my disposal. If you're not as fortunate, ask the surrounding factories around you. Or if you happen to know anyone who works at work, see of they can get you some. They don't have to be pretty. Most factories are more than happy to give away their scrap pallets.
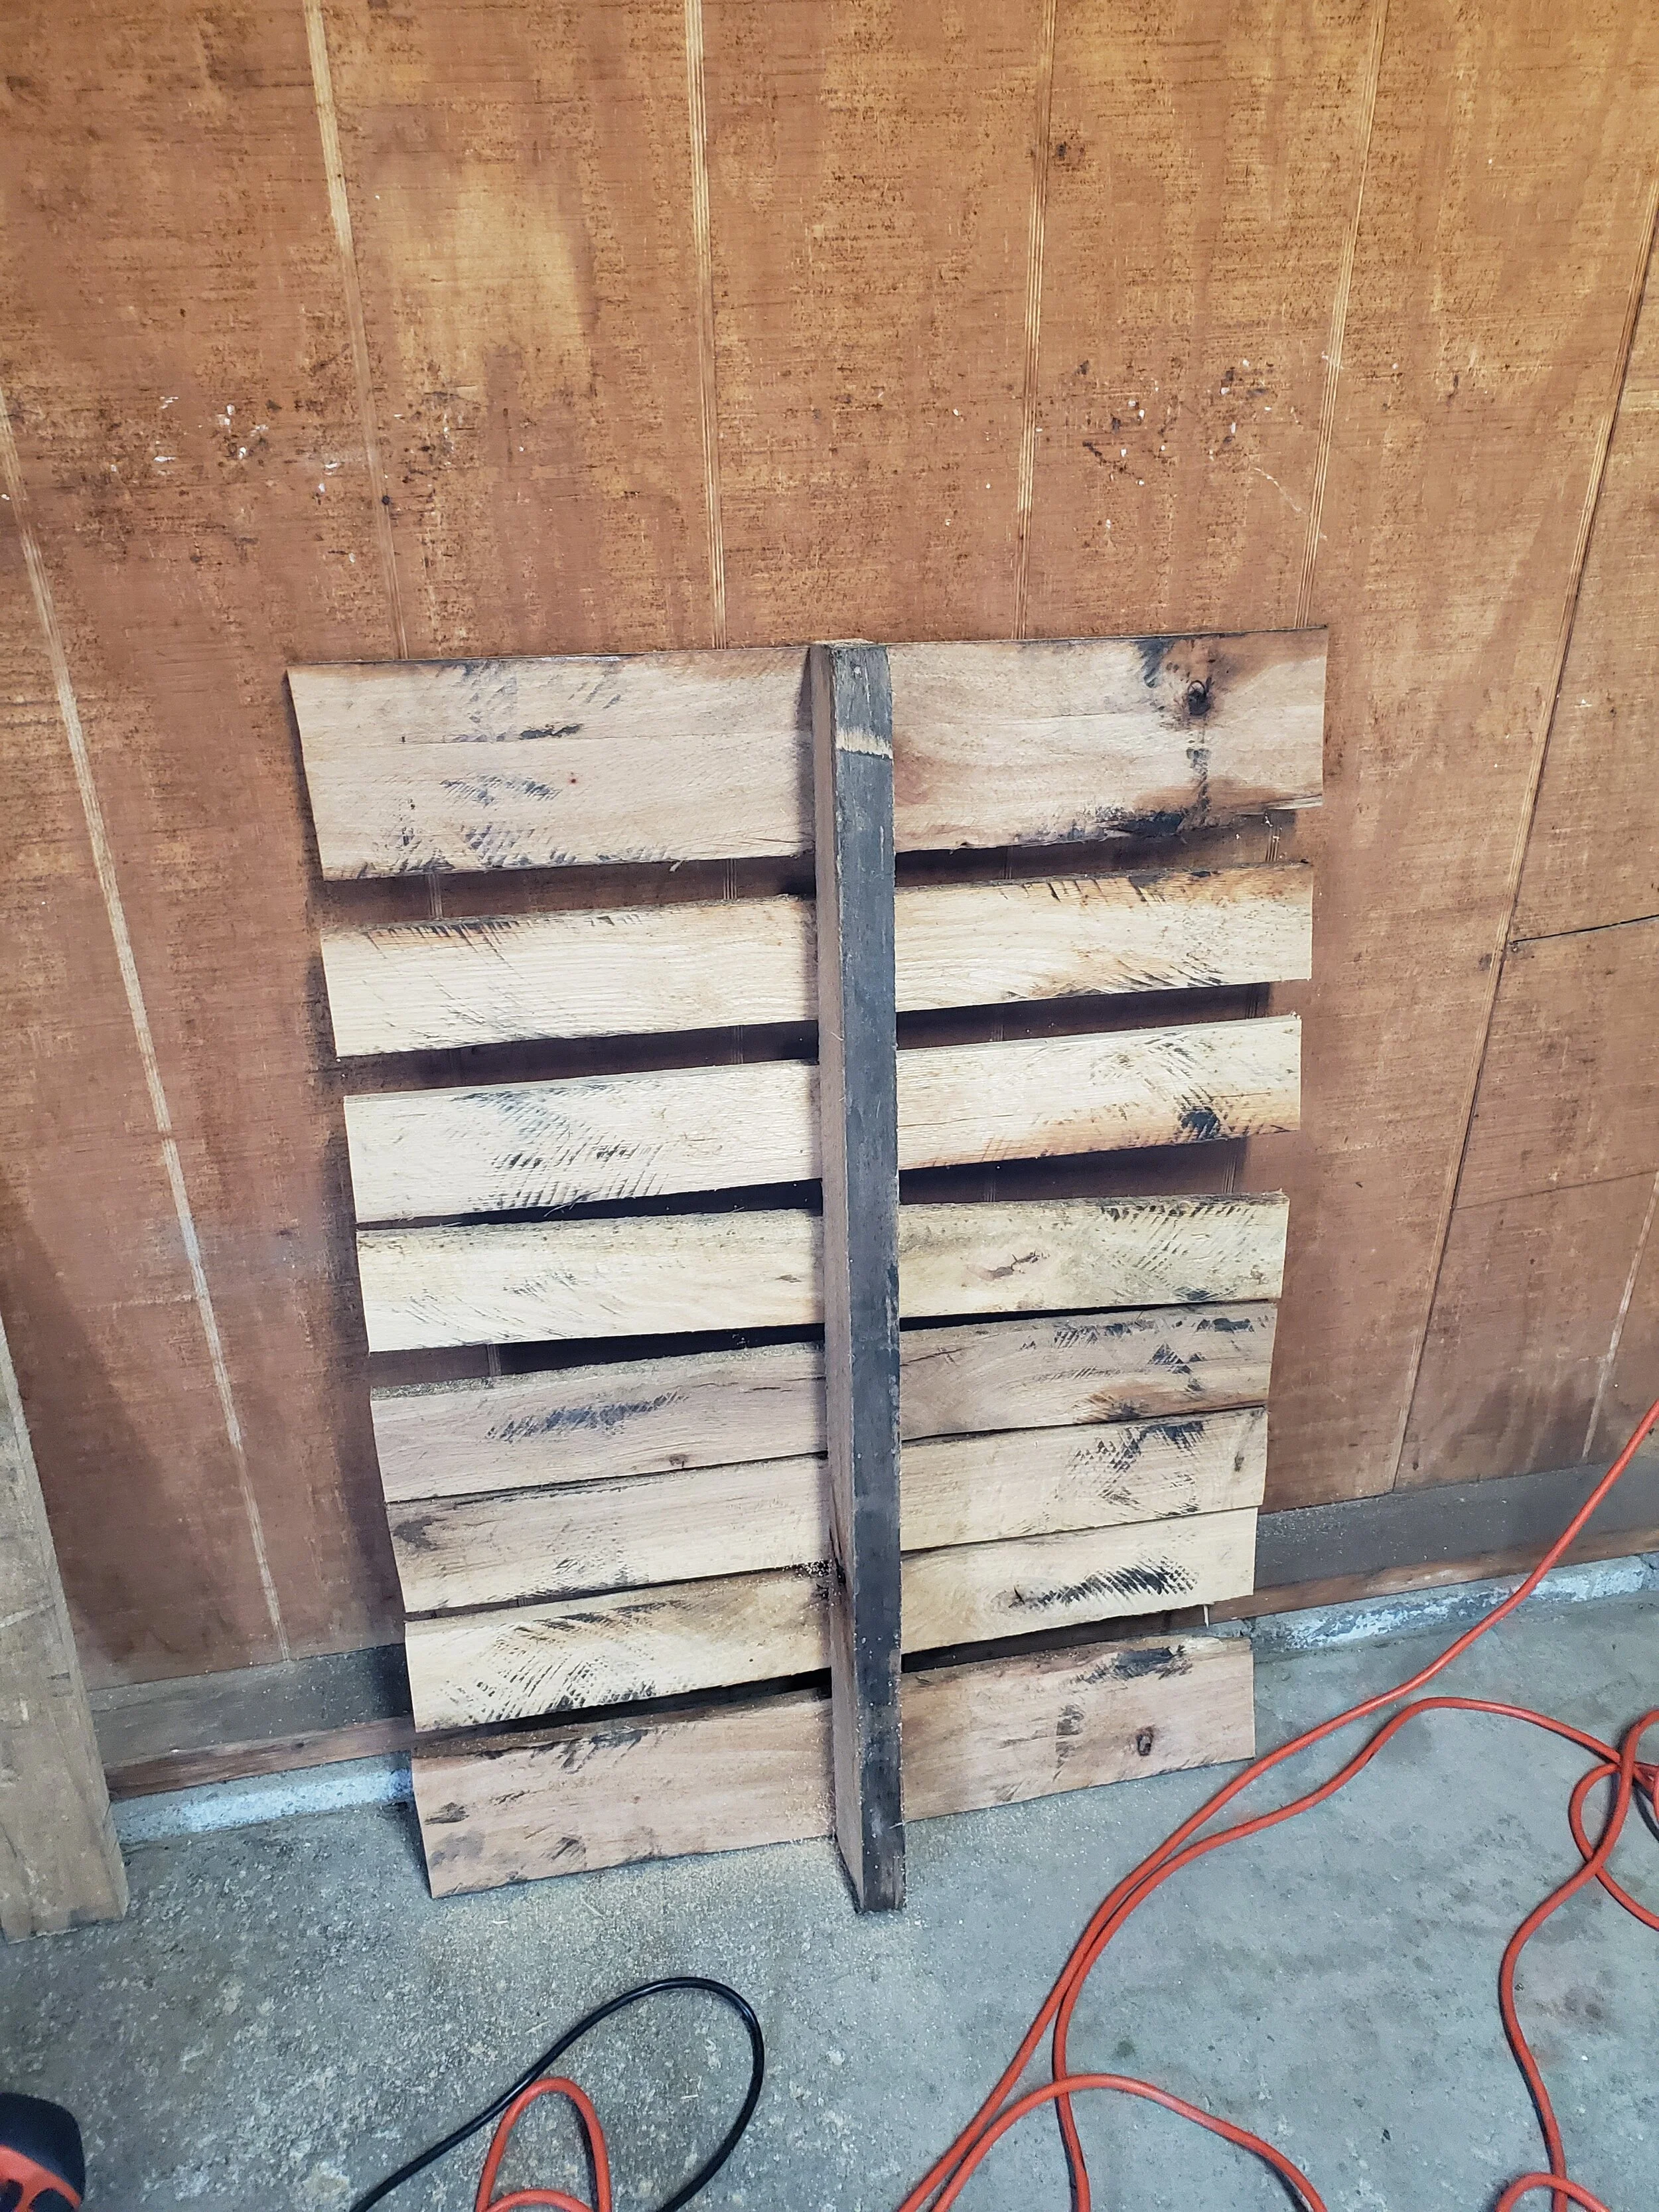

STEP 1: Take the pallets completely apart board for board. This can be time consuming and not always easy. The pallets I got were stuck together with brads which are extremely hard to remove as they're imbeded in the wood and I don't own a Sawzall so I used a jig saw and cut just below the area where the nails are together on the outside of the pallets. Once the tops and bottoms are cut it's easier to pry the boards away from the middle support.

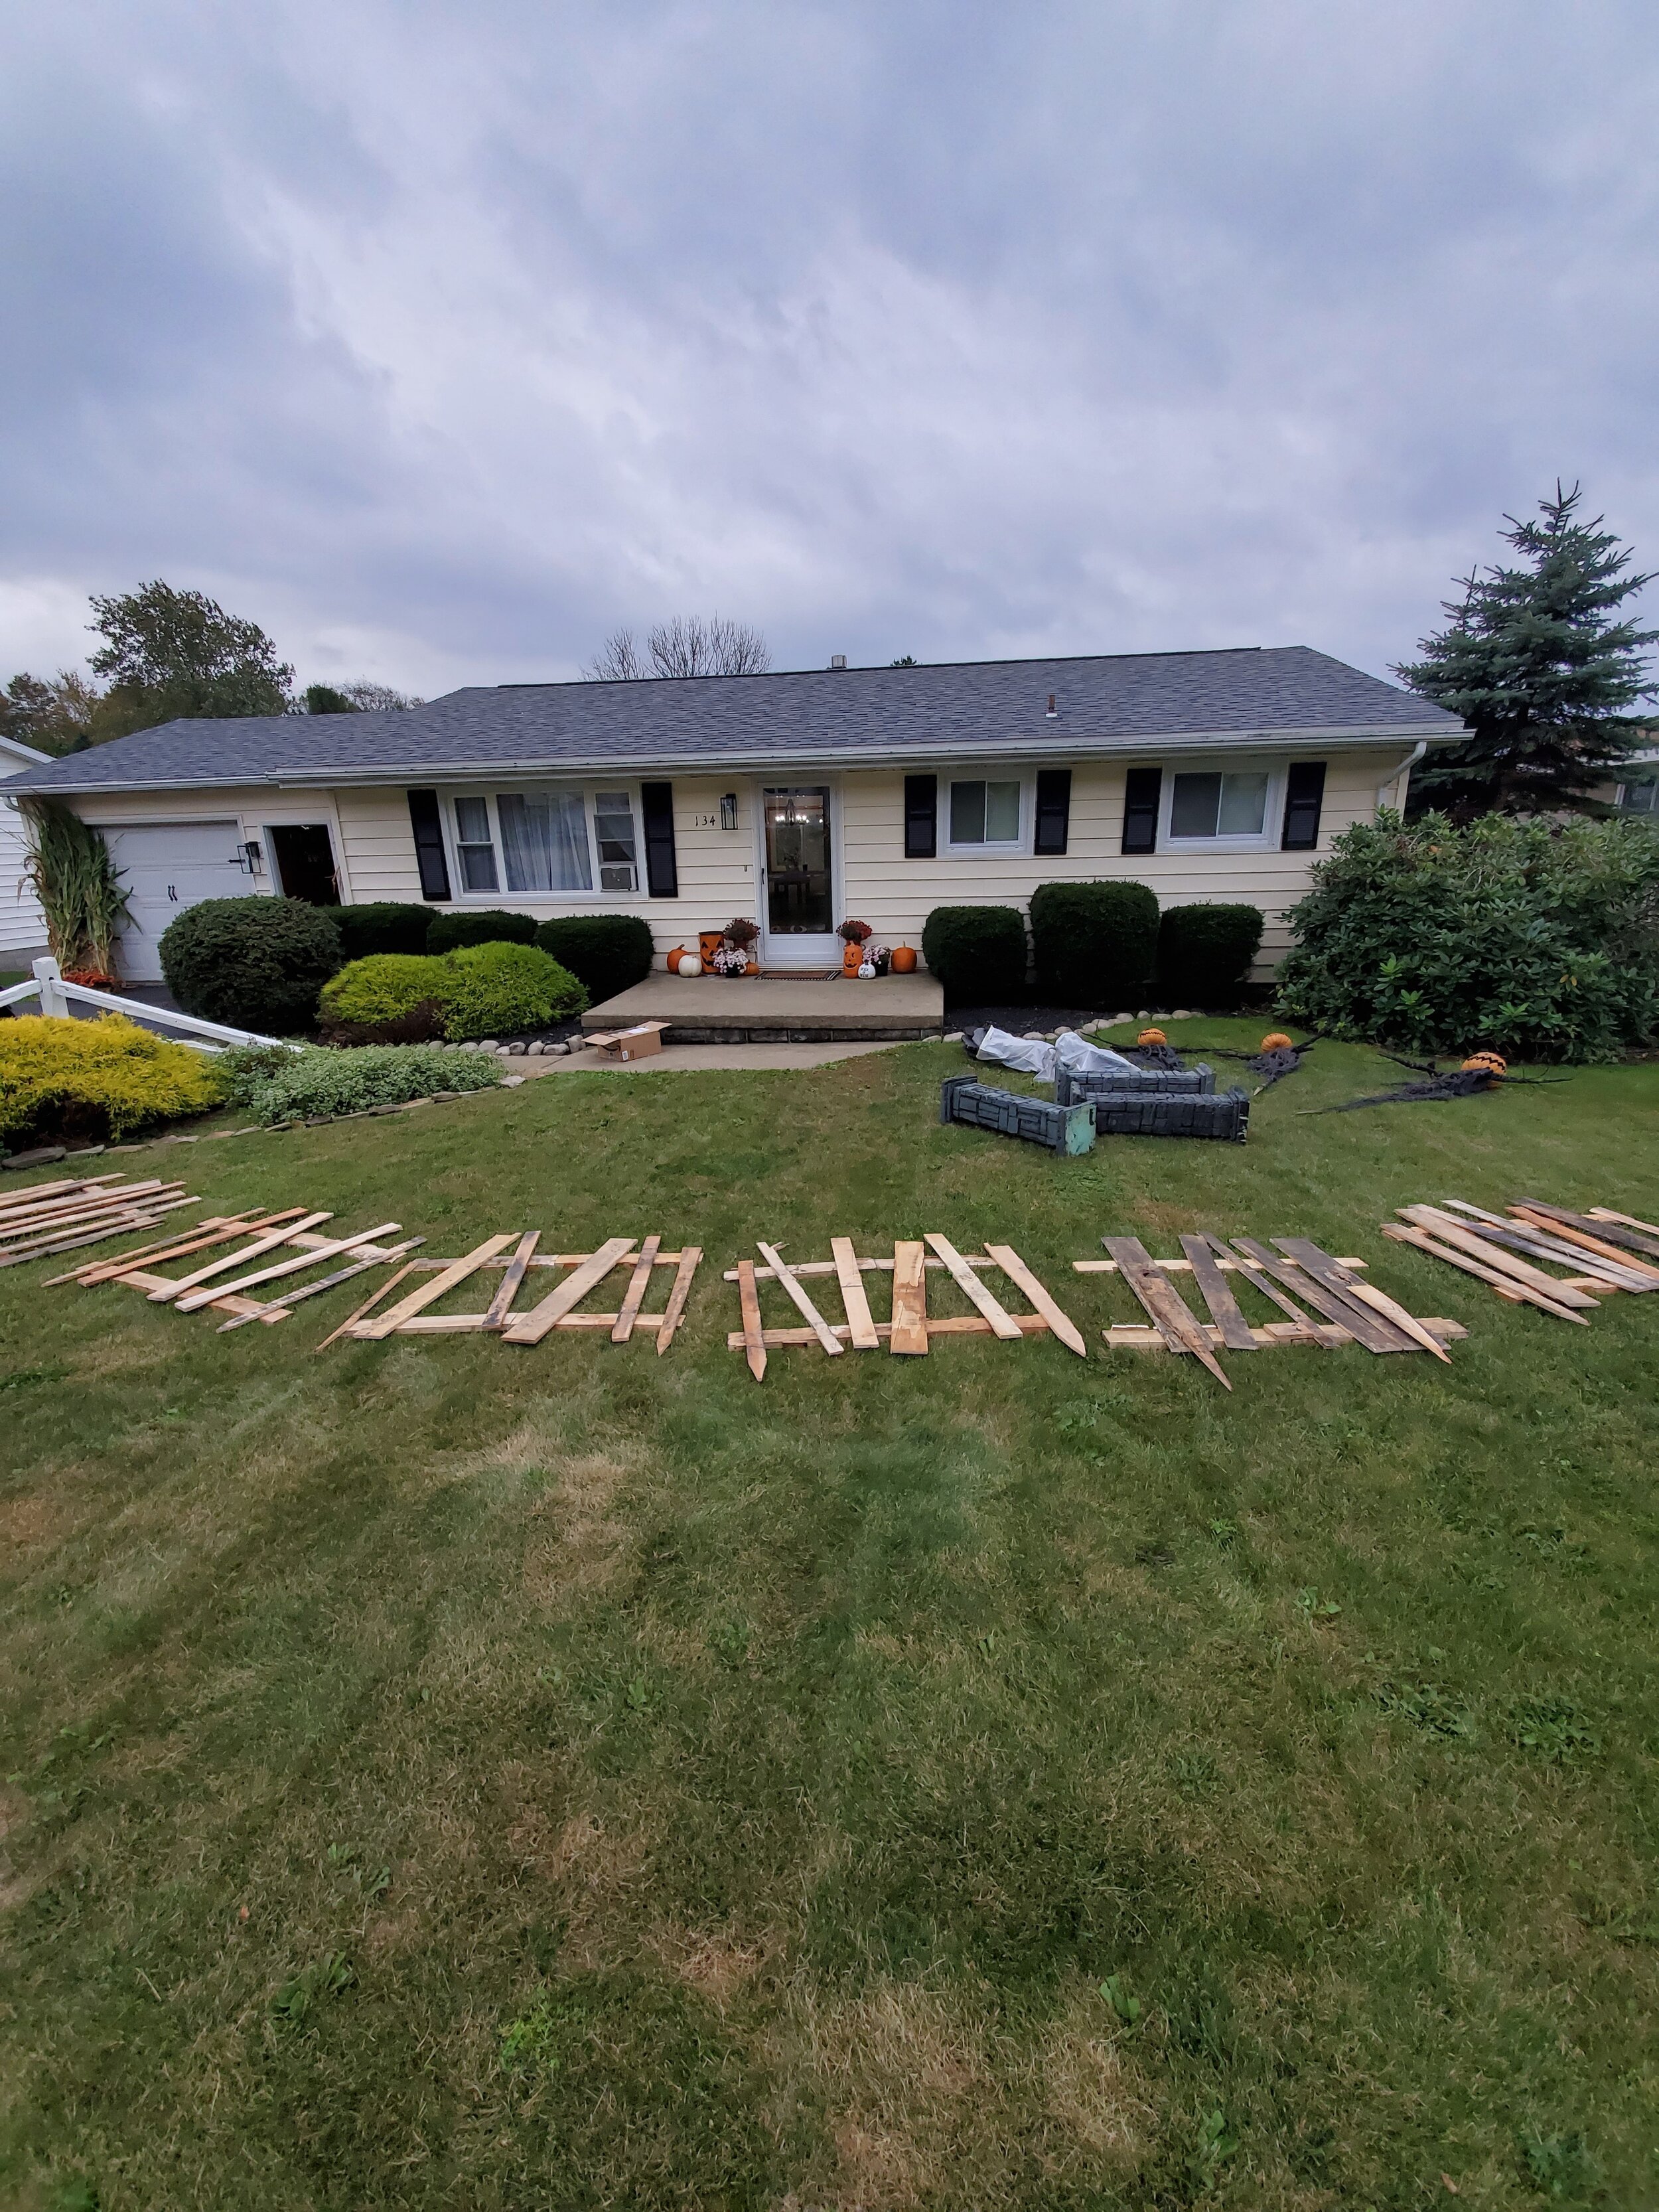
STEP 2: Map put your fence by placing and shaping them out with the boards on the ground. I didn't measure anything at all as it's not suppose to look perfect; the stranger the shape of the fence the better it will look. I started by putting my top and bottom down then I placed the middle boards at random in different positions.
STEP 3: Get your wood glue handy and put a generous dab wherever the boards will be touching. After that reinforce the spots with your nail gun and slam a few nails or brads through. You don't have to wait for the glue to dry to start nailing. This takes a lot of time and it will eventually dry. Allow the glue to dry once you're done nailing.

STEP 4: I was able to get out 6 pieces of fencing total. So, I'll need at least 6 posts to keep them up. Slam a post up in the middle of each piece of fence and either tie, zip tie or screw them together. This way you're not beating the shit out of your own project and it might last a little longer. I used a few old broom handles for my posts. You could honestly probably get away with using one post for each piece of fencing. Just mess around with it and do what works best for you.
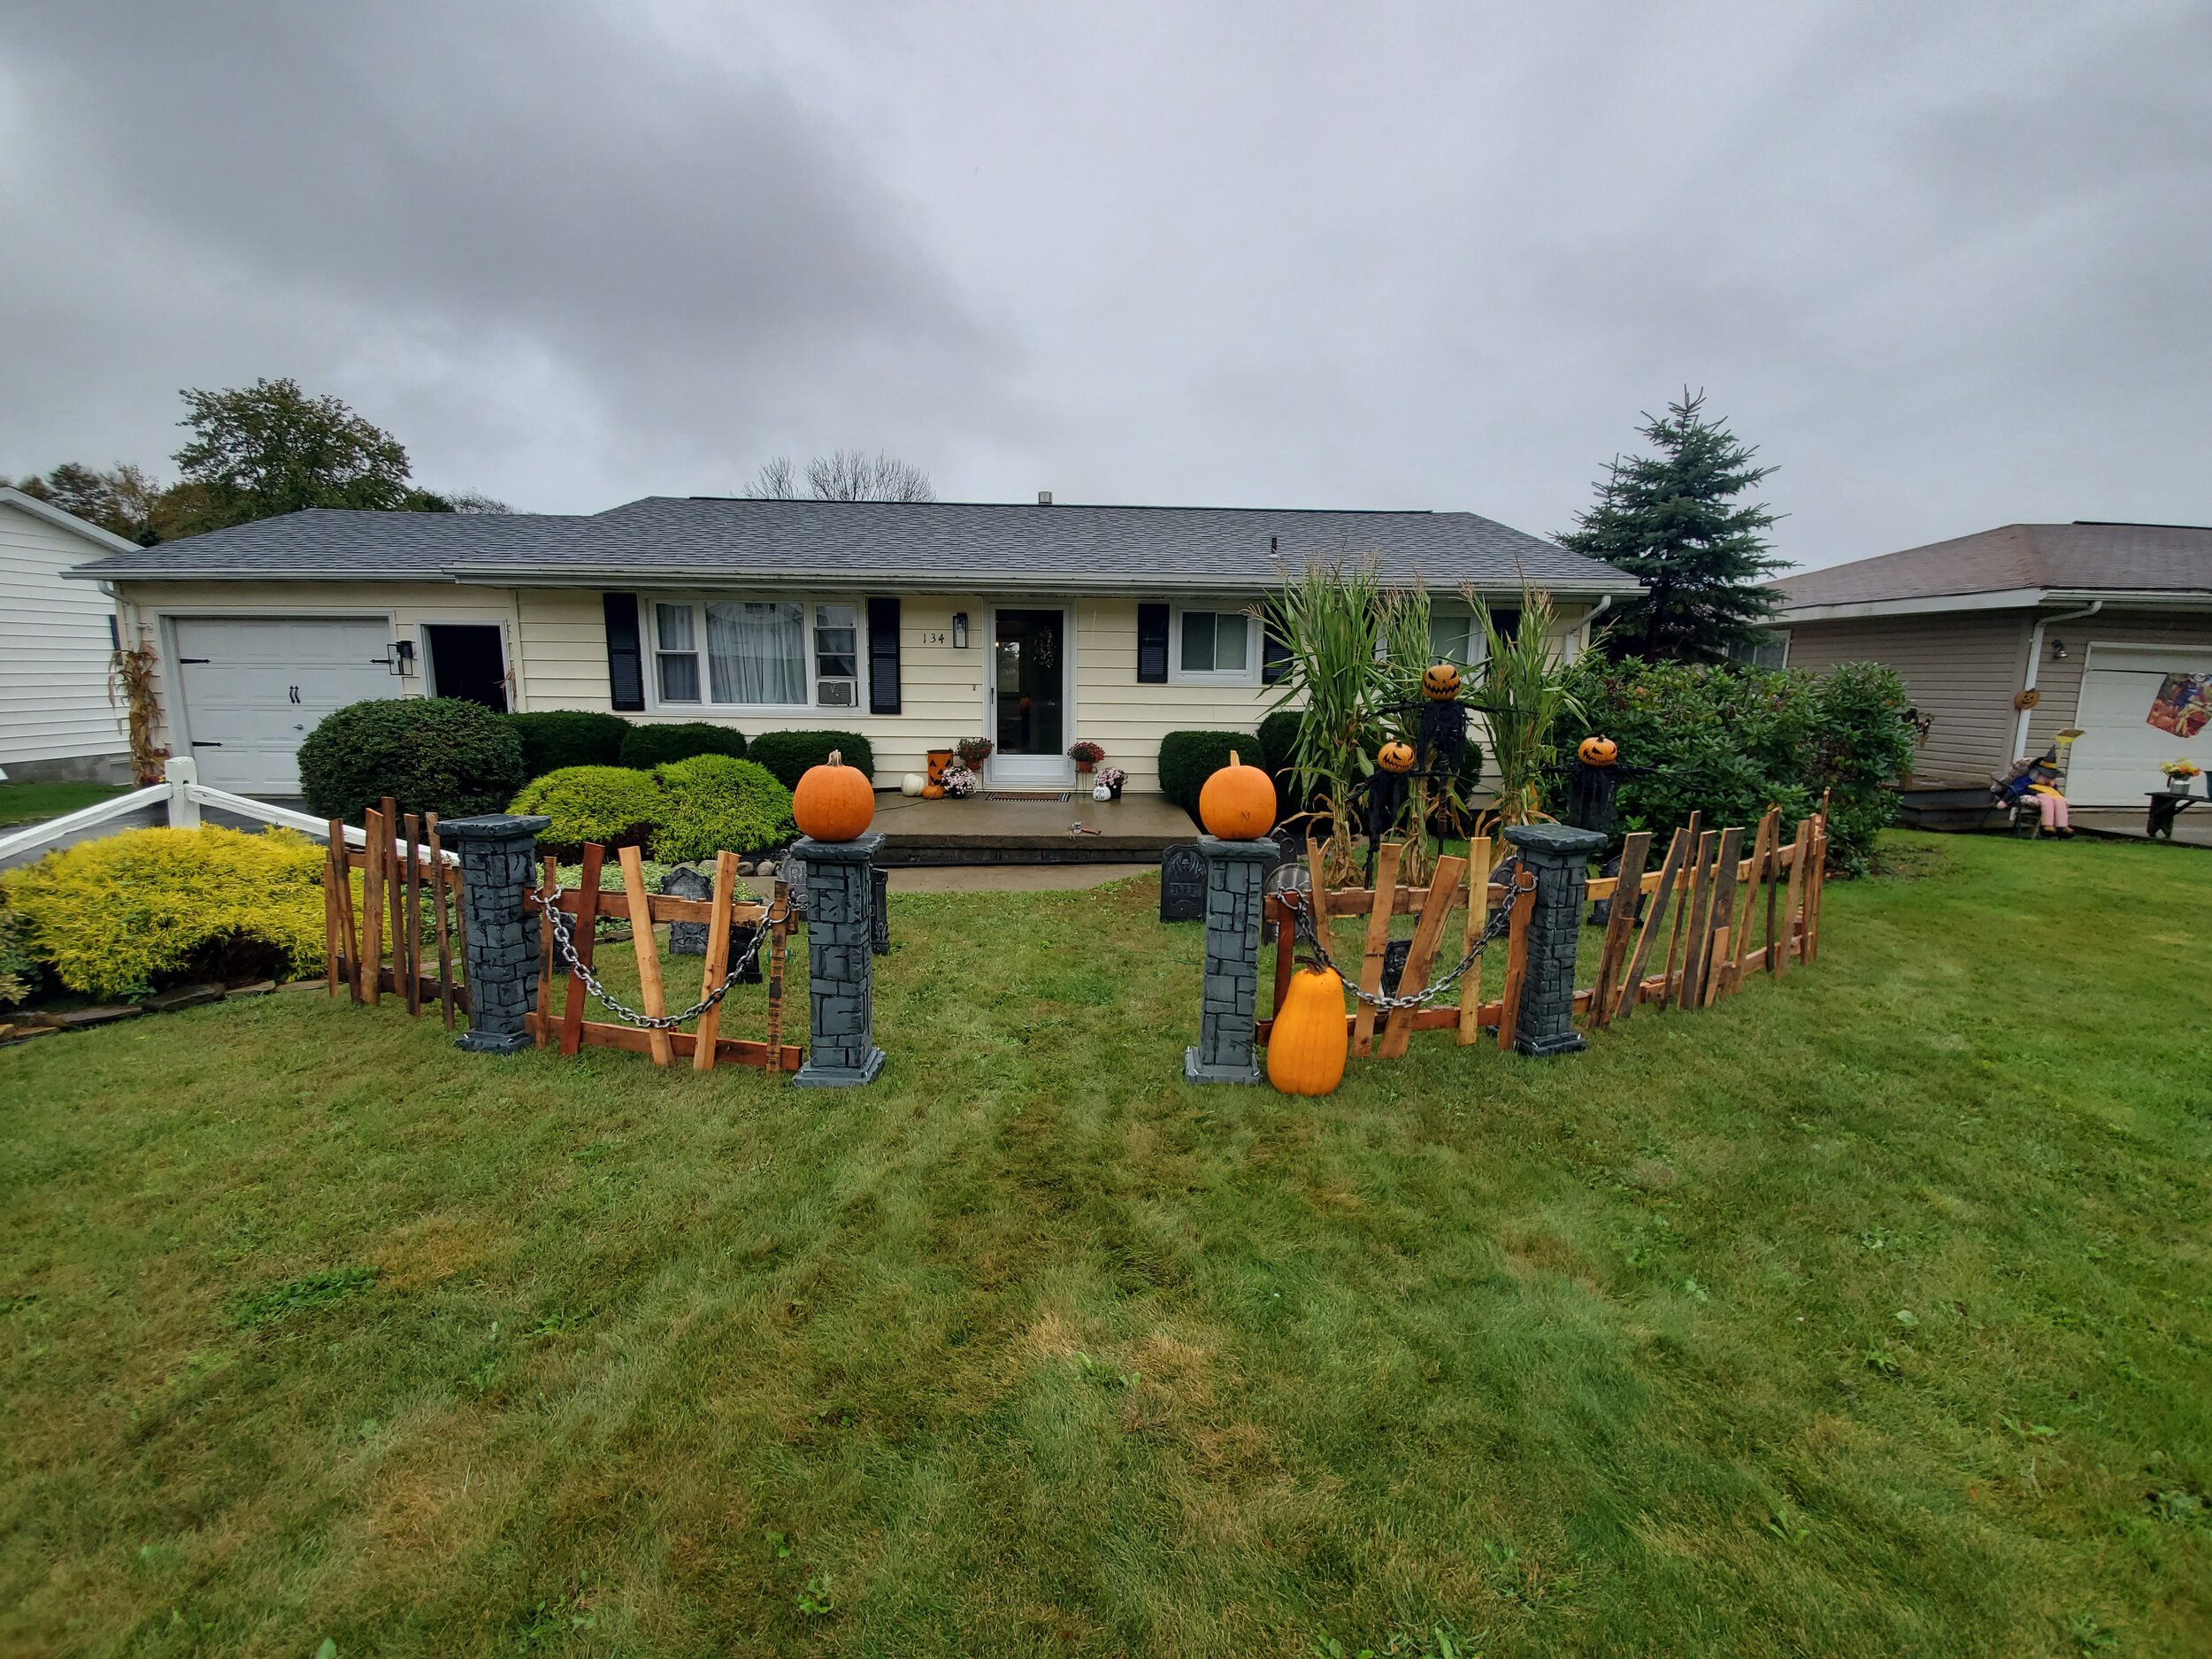
And that's really all there is to it. You can get a little creative with them and throw webs or creepy fabric over them. I used plastic chains a few times, it makes them look a little more interesting. I also made these faux stone pillars out of insulation foam board a few years back. I like putting them in between pieces to make it look a little more official. Id like to thank you all for reading! Now go out there and make your yard spooky!